

ucoulddoit
-
Posts
283 -
Joined
-
Last visited
-
Days Won
2
Content Type
Profiles
Forums
Classifieds
Tip Site Directory
Blogs
Articles
News
Arborist Reviews
Arbtalk Knot Guide
Gallery
Store
Freelancers directory
Everything posted by ucoulddoit
-
Thanks for the compliment Corco 2000. I'm sure you could build this in some places without planning permission but there are local restrictions around here which was annoying. The slab is 100mm thick with a layer of A142 steel mesh. The location is not accessible from the road so I mixed the concrete in a Belle half bag mixer and cast it in three panels. I used an MS391 which is on the small side for milling but it is for my own use rather than trying to make money so I just took my time. At the start of milling the timber for this project I already had an Alaskan Small Log Mill and bought an Alaskan Mini Mill to make it easier to cut the sides of the beams. About half way through milling all the beams, following advice from Alec (Agg221) I bought a 25" bar and a Granberg rip chain and also some extra bits for the mill so that I could convert it into an Alaskan 24" mill. The max bar length recommennded for the MS391 is 20", but as you lose 5 to 6" off the length once the mill is fitted I decided to try with a longer bar so that I could go up to almost 20" with the Alaskan 24 mill and this worked fine although a bit slow on a full width cut. Just starting to mill some more inaccessible larch logs this weekend into thick slabs which I'll be able to manhandle out of the wood and take to a bandsaw mill for milling into cladding to be fitted this summer.
-
I've a similar problem with a small walnut table finished with Osmo Top Oil a few days ago. First time I've used Osmo Top Oil, so pretty disappointed as it gets excellent reviews online. Just resanded the top tonight as water drips seemed to have soaked right through and raised the grain in small spots. Can't understand why it's happened. I wondered if the waxy oil hadn't soaked into the walnut despite having three coats at 12 hour intervals? Andrew
-
The title of this thread sounds like a question my family sometimes ask me! I enjoy sourcing, milling and drying timber as a hobby in itself and have accumulated several tons of milled timber over recent years which is gradually getting used mainly to make pieces of furniture for family. Part of the interest has come from working with numerous different species of wood, seeing how each reacts to the drying process, how to avoid drying defects, experimenting with different methods of milling to achieve different grain patterns, aiming to produce timber that it is not readily available to buy, which to me gives it ‘added value’ but still for my own use. At the start I was concerned about the time it would take to air dry planks on the basis of the rule of thumb of a year per inch thickness followed by perhaps another year storing it in a dry indoor environment as I had no access to a kiln and wanted to use if for furniture in a centrally heated home. So a 2 inch thick plank might take 2 ½ to 3 years before being ready to use. Having got passed the first two or three years when I was impatiently waiting for the first timber to dry, replenishing the ‘stock’ on an ongoing basis has far outpaced the rate at which I can use it, hence the mounting pile of timber. So I tend not to mill for specific projects and follow advice I read in a book written about 40 years ago, ‘The fine art of cabinetmaking’ by James Krenov. In the chapter titled ‘Wood’ he says, ‘Recently I have noticed craftsmen tending to obtain wood by sawing it themselves. A concept new in America is emerging: that of the flitch cut log and fine, thick planks which will later be re-sawn to sizes needed.’ So I now tend to mill quite thick, say 3 or 4 inches which takes years to dry but I can now wait, and then re-saw it on a large bandsaw to the sizes needed for specific projects which I aim to design to suit the characteristics of the available timber rather than milling to suit a specific design. Andrew
-
Woodworking chisels.... different types for what jobs?
ucoulddoit replied to SteveA's topic in Woodcraft Forum
Axminster Tools and Machinery stock forged all steel wood chisels which I found very good and can be struck with a lump hammer. I bought the 30mm and 50mm straight chisels and wished I had also bought the 40mm cranked chisel. A 38mm 'normal' chisel I bought which was designed to be used with a steel hammer broke inside the handle after just a couple of large mortices. Andrew -
A boxed heart column will almost certainly develop long splits along its length as it dries, but surprisingly, it's more of an aesthetic issue than a concern about strength, unless it split in half along the full length, but I've not heard of that happening. John Boddy's had a method of drilling a largish hole the full length along the pith/centre which apparently reduced the splitting very significantly. I've also heard of a technique where a saw cut is made the full length of a column on the least visible side (e.g. the side against a wall) and this minimises random drying splits developing on the other sides. I realised my comment about a beam/column drying and distorting into a diamond shape if milled away from the heart doesn't apply for those that are quarter sawn. Andrew
-
There have been a few references to boxing the heart recently which has made me think about how relevant it is. Perhaps it was just the traditional way of squaring off a log by hewing the sides with an axe before bandsaws were invented and so now not needed but we continue to do it because it is the way it has always been done? In terms of strength, visual grading is based on the visible defects on the outside of a beam or column and since the most significant defects tend to originate in the heart, a boxed heart section with the pith at the centre, milled from a small/medium sized log is likely to have fewer visible defects on the outside and hence, I would say this is likely to achieve a higher strength grade compared to a section milled with the pith on one face for instance. So that is an advantage. Nowadays large diameter logs can be easily handled with machinery and milled so there is no need to be restricted to small/medium diameter logs. The outer parts of large logs are likely to have more closely spaced growth rings and might be completely clear of defects such as knots, wane and fissures. So I would speculate that this timber will have a high strength grade, maybe even higher than the boxed heart section. But as it dries, the original sawn squared section will distort into a diamond shape whereas the boxed heart section will remain nearer to a square shape. This probably doesn't matter for floor joists or beams, but in a timber frame, the beam to column joints need to remain tightly together, held by the oak pegs. So if the column distorts into a diamond shape the joints may open excessively. But this will be more of an issue on columns with a large cross section so not always relevant. Another other issue that I think might be a problem is a beam or column warping along its length as it dries. I feel that a boxed heart column which has no intermediate restraints between each floor level is more likely to stay straight compared to a timber cut from the outer part of the log. A banana shaped column is obviously weaker than a straight one. But a beam or joist cut from the outer part of a log and used as part of a floor will be restrained by floorboards or other timbers which hold it in a straight line as the frame dries. Andrew
-
Found an interesting recent publication on google about using green softwoods in construction including post and beam, which might be of interest to others. It promotes using larch which is predicted to be widely available due to felling because of .... (can't remember the name of the bug/virus). Just needs a bit of innovation in the supply chain to get people to start using it in decent quantities. http://www.bc.bangor.ac.uk/news-and-resources/news/documents/WelshSoftwoodsinConstructionReportNov13.pdf Andrew
-
Timber framing joints - top tips (preferably with diagrams) thread
ucoulddoit replied to SteveA's topic in Woodcraft Forum
Steve Happy to share this although I'm not sure how legible it will be and it is quite a small outbuilding. One thing to note is there is no roof bracing shown. I relied on the steel roof sheeting which was well stiched together at the overlaps and fixed to dwangs along each end of the roof, but others might prefer diagonal BAT straps or something similar. Andrew
-
Cheers Nick. I'll be using vertical larch boards a bit like 'Yorkshire Cladding' used on farm buildings, but with a second layer of boards on the inside which will hopefully encourage good airflow, but keep the rain out. I'm planning to mill some thick slabs from logs using the Alaskan mill, so that I can manhandle them out of the wood and have them milled locally on a band mill. I'm pleased at how the joints turned out, but it was time consuming scribing the joints, cutting them, trial fitting, further work on the joints, etc. and the timbers were so heavy to move about. I suppose with practice, you can get a good tight joint almost first time? Andrew
-
Thanks for all the comments. The columns are 200 x 200 which is pretty chunky for a total roof area of about 26m2. The vertical loads are very low compared to the post capacity so it was the wind loads and the fact that the bracing mortices remove a lot of timber at the point of maximum bending which determined the column size. I could probably have reduced the size a bit, but decided not to rely on resisting any tension force in the diagonal braces and the oak pegs at the end connections. Although each wall has two diagonal braces, only the one that is in compression for a particular wind direction is assumed to be working. Probably a bit over engineered, but it does mean the frame is quite robust and should be suitable for a change of use in the future. Andrew
-
Another progress photo as the frame is complete and the roof is on, and there will be no further work until the spring while the larch wall cladding is milled over the winter. There have been a few comments/concerns on other threads about structural grading of self-milled timber, structural use of green softwoods, etc. so I thought there might be some interest to hear my views about structural use of green softwoods. This post is quite long…… I used BS 4978 'Visual strength grading of softwood - specification' as the basis for visually grading the larch, and used the wet graded category. I based the structural calculations on GS grade (general structural) rather than the higher strength SS (special structural) even though much of the milled timber complied with the higher grade requirements. When milling timber for a specific project, there is a bit of a chicken and egg situation with the calculations as the size of a beam or column is assessed by carrying out calculations which include an assumption of the strength grade, before the timber is milled. So if the assumed strength grade is high, there is a risk that a significant amount of the milled timber will be a lower grade and hence the wrong section size/too small for the proposed use. Each individual piece of timber needs to be strength graded. It is not possible to determine the strength of the pieces of timber that will be milled from a log by looking at the outside of the round log or by knowing the timber species or by testing a small sample. Individual timbers milled from the same log may have different structural grades. For instance, if a graded timber is cut lengthwise into two pieces, each piece should be re-graded. Having said that, it was pretty obvious from looking at the available larch logs that the best timber would be from the bottom few metres of the trees where there had been no branches for many years. So I selectively milled the logs which worked well. For the strength properties of the larch I used BS 5268 part 2 which also includes strength properties for British grown douglas fir, pine and spruce. Each species is designated as either GS or SS, but the species are not interchangeable. Larch GS grade is stronger than the GS grade for the other three species for instance and if ‘dry’, is equivalent to C16 softwood. To allow for the timber being 'green' and wet graded, I reduced the allowable stresses on the basis that it was service class 3. For bending stresses, the reduction factor is 0.8 (80%), so a fairly modest reduction. Compression strength is reduced by a factor of 0.6, so much more significant. Service class 3 applies to timbers with a moisture content above 20% at the time of installation, with no upper limit. This reduction factor is not specifically intended to be used for green timbers. It is used for external timbers and timbers with thickness exceeding 100mm which are difficult to dry. So this was a point at which I used judgement and made a pragmatic decision that for a small scale project for my own use which didn't need statutory approval, the reduction factor was acceptable. I wouldn't do this for a high value structure such as a frame in a house without further research about the wet grading, but to be honest, it looks fine. In terms of construction details I used standard oak framing principles but increased the joint proportions slightly and this seems to be fine but I'll need to see how the joints withstand distortions and shrinkage as the frame timbers dry over the next few years. I visually graded the larch timbers for this frame myself, but I have to confess that I didn't carry out a really detailed inspection of every timber. Only the central rafter and the corner columns needed to be sized based on the calculated stresses so I did inspect and visually grade these carefully. The sizes for all other elements were based on either aesthetics (e.g. all three rafters are the same size although the loading on the central rafter is much higher than on the eaves rafters), or the joint details to allow for the oak peg spacing, etc. I used my judgement to ensure that there were no significant defects at the points of highest stress in these timbers. As the three rafters were all milled the same size, I was able to select the best one for the most highly loaded central rafter and did the same for the columns. Also, I milled the timbers well over the length required (as it was free) so that I could exclude defects from critical points such as joints. I’m sure this overall approach has been done by timber framers for centuries……? All that might seem a bit over the top for such a small outbuilding, but I've found it interesting to see that the final design is more or less what I might have built using only my judgement for the timber sizes and details. Also, reassuring that hopefully it will survive the winter storms. It has been very time consuming to fabricate the frame and if I hadn't been set on a traditional form of construction and the inherent aesthetics, it would have been much quicker to use lap joints with bolts. I wouldn’t hesitate to use green larch again for a project like this provided I could source slow grown old trees. It has just over 60 cu ft of milled green larch which I suppose would have cost between £1500 to £2000 in green oak including transport so with a bit of creative accounting, this one small project has more than covered the cost of my chainsaw and alaskan mill! The only problem so far? My wife has decided it looks to be far too good for a timber drying shed and is keen for it to be completed as an 'artist's studio' with the larch frame left exposed on the inside........ Andrew

-
Thanks for the comments Alec and I realised ages ago that you had milled the timber for your house. Sounds like you found a good engineer to work with who had a pragmatic attitude to this sort of project. Have you ever posted pictures of it? Sounds like my milling rate is a bit slow, and I'm conscious that I am probably a bit of a small saw fanatic! But it stems from my suspicion that buying a big saw might be a barrier to getting started with milling for many people who, like me have daydreamed about milling timber and seasoning it themselves to make stuff for the family which they can enjoy for years..... Although my milling rate is a bit slow, in terms of enjoyment, it has been fantastically fulfilling to start with logs that were free and destined to either be left to rot or turned into firewood, and now have an 'engineered' structure! Albeit in my daydream it was an oak frame, not larch, but it should outlast me..... Andrew
-
The issue of strength grading timber is potentially a real problem if not approached in the right way and in my opinion starts with selection of suitable logs and milling to produce 'structural' timbers, not just milled timber. I worked as a structural design engineer for many years, including a fair bit of timber engineering and green oak framing, and would have been quite wary of accepting timbers that weren't certified - the potential consequences and liabilities were just not worth taking a risk..... For instance, large section timbers for beams and columns are often milled by 'boxing the heart', but you can't check this once the structure is up and trust, built up over time and successful projects often has to be relied upon rather than detailed checks of every millimetre of wood. If a piece of graded timber is sawn along its length into two pieces, they may become different grades to the original piece. And there are other potential problems. Having said that, timber framers worked for centuries without regulations and with some care and knowledge I don't see any major barriers to using self milled structural timbers for your own use. But I think it would be advisable to start by learning about green oak framing, the construction issues and have a completed frame design before starting to mill. Also, I'd recommend having the timbers independently graded if they are being used in a major investment such as a house. I mentioned in an earlier post on this thread that I've just completed construction of a frame for an outbuilding using green larch. As Alec mentioned, published guidance on strength grading green softwoods is limited, but I'll look over my notes from when I designed the frame and post a few notes about my approach which might be of interest to others. One other thought that this thread raised is the difference between chainsaw milling through and through boards for joinery and furniture making, compared to milling large section structural timbers. I don't have anywhere near the experience of many of the others who have added to this thread. But from my limited experience it seems to me that a large chainsaw is a major advantage when milling through and through boards, often from quite large logs. After a bit of time spent setting up and making the first cut, the subsequent cuts are quickly made (and even quicker with a big saw). Whereas a large section structural timber, requires setting up to remove the top from the log. Then (assuming like me you have just one chainsaw) remove the Alaskan mill from the chainsaw and fit the mini mill. Set up the guide board and cut off one side of the log at exactly 90 degrees to the first cut. Re-attach the Alasken mill and cut off the bottom of the log. Rotate the log and cut off the fourth side. And all done single handedly....! So a lot more time spent setting up and proportionately less actually milling? I wondered if others find milling structural timbers more time consuming than T+T boards? Working alone, on a good day, on a steep slope, after a bit of practice, I could complete two large section beams/columns...... Final thought that others might want to comment on is that logs milled for structural timbers are often small/medium sized and yield just one beam/column with the heart boxed, or perhaps a couple of joists, one each side of the heart? Andrew
-
I started chainsaw milling with a very small Stihl chainsaw (MS170?) with a 14 inch bar and the small log mill. So I was able to slowly mill up to about 12 inches width which was fine for occasional 'hobby' use. Larger logs were first sawn freehand lengthwise into smaller sections for further sawing with the small log mill. Quite wasteful and time consuming, but for minimal outlay I was able to start milling with a saw that I already had and after a while was 'hooked' and keen to progress to bigger stuff. So I bought a new MS391 with a 20 inch bar for use in the small log mill which increased my cutting width to 18 inches. Working at the width limit of 18 inches on the small log mill I found it difficult to cut planks with equal thickness across the full width. I realised that by buying additional parts from Rob D, the small log mill could be converted to a 24 inch Alaskan mill and Alec (Agg 221) gave advice about which bars would fit the MS391. I'd assumed that 20 inches was the maximum length and hadn't realised that longer bars were the same fitting, so bought a 25 inch bar which gives about 19 inches max width of cut with the 'Alaskan' mill. Still a bit slow, but for occasional 'hobby' use I just put up with it. I may one day progress to an MS660 or 880, but would hesitate to recommend that route to someone who has never milled with a chainsaw before or seen a mill in action. I'd suggest starting with what you have and decide if it really is the way forward. Milling all the timber for a house sounds like an epic task to me. I've almost finished building a timber frame for a small outbuilding using green larch (see thread on the woodcraft section) which is tiny by comparison to a house. I milled all the main timbers but have decided to use softwood from the local builders merchant for the secondary framing such as purlins and side rails, and will take larch logs to a woodmiser a few miles away to mill the wall cladding. Andrew
-
Thanks Nick. I am really pleased with how it's going. It would have been possible to have a green roof and I thought about doubling up the rafters to keep their weight down. Another option would have been to cut a vertical slot along the length of the rafters for a steel plate to make them into flitch beams. But as my first choice of a double pitched roof with traditional finishes, space inside for extra storage, etc. wasn't possible, I just decided to keep it simple and relatively low cost. The rest of the frame is more than strong enough. It's quite 'chunky' as I've made allowance for timber framed wall panels to be fitted in the future if I decide to change it's use to a workshop, and so it's designed as a fully clad structure to withstand hurricane force winds which occur most winters where it's built. Typically 90 to 100 mph every year and more in the really bad storms! Andrew
-
It would be great to have a pitched roof with timber shingles or something like that, but I needed to keep it as low as possible due to neighbours concerns. So unfortunately it will just be a simple monopitch with steel cladding. I had thought about a green/grass roof, but the extra weight would have needed very heavy roof beams. So it will be quite simple and functional but a useful covered area. Andrew
-
A (slow) progress update on this project. Quite wet in Scotland this summer which is not great for woodworking outside and I'd underestimated the time it would take to cut the scribed mortice and tenon joints in the slightly irregular timbers straight off the Alaskan mill. But it's looking good with the first frames lifted over the weekend by my wife and I. I reckoned the heaviest frame was about 350 lbs weight which took some effort to raise it safely. Andrew


-
Looking at the picture and the shape of bark on the front, I wondered if it is a sign of spiral grain which might make the planks twist and distort more than usual as they dry? I had a small spalted beech butt bought from a firewood merchant with both spiral grain and reaction wood caused by growing leaning at an angle rather than vertical. Despite higher wastage than normal due to excessive distortion, the usable timber was great. If those two butts are past the optimum period for milling, I wondered if it might now be worth leaving them for a year or two longer in the hope that any spalling might spread further? Andrew
-
Thanks for that. I was also worried about the whole thing blowing away in a gale so have cast concrete plinths to raise the posts off the ground/slab and cast a threaded rod right through the slab and plinth with a steel plate under the slab. All a bit fiddly to get everything set out properly and difficult to cast the slab in the open with the recent poor weather. Also, it will be awkward to lift the posts over the threaded rods and get a nut on the end, through a hole drilled into the side of the posts.......! Picture below shows a plinth and threaded rod. Also a picture of milling a beam on the hillside behind the house, early last year before the midges were too bad. Quite difficult to do this and move the logs, working alone. Also, the outbuilding required planning permission and despite getting this, a neighbour used a loophole in my title deeds to stop me progressing so it needed an application to the Lands Tribunal which was successful. So after two years and many difficulties since the first posts/beams were milled, it is good to be making progress. Should all be worth it. Not sure that those first posts/beams are still 'green' which may make cutting the joints a bit more difficult....... Andrew


-
I'm about to start fabricating a frame for a small timber framed outbuilding which will be similar to a green oak frame but I'm using green larch instead. I just wondered if anyone has any experience using green larch compared to green oak and in particular if similar joint details work OK? For instance, when draw boring for the pegged mortice and tenon joints will an offset of 3/16 inch work OK? I assume that oak pegs will be fine? The outbuilding will be mainly used for air drying timber that I've milled for my own use. I've used my Alaskan mill to cut the larch beams and posts from trees about 100 years old which had been felled on land behind our house and were given to me. The timber looks to be excellent quality and hopefully the natural preservatives in larch will mean that it doesn't deteriorate for many years. I'll post some pictures over the coming months as it progresses. Andrew
-
You can use a single ladder. Place the ladder onto the first length to be cut and use wedges to raise it parallel to the centreline using a string line tied to vertical bits of wood nailed into each end of the butt to set the height at each end of the ladder. Keep a note of the height from the pith to the string line. The wedges at the end of the ladder/end of first cut are screwed to the butt so the when the ladder is moved along, it can be supported at exactly the same height at this point. The string line is used again to set the ladder height at the end of the butt. I used this method to cut three 17 foot beams with a 12 foot ladder and it worked fine. Andrew
-
I saw this thread last year and was tempted to buy Chainsaw Lumbermaking but it was pretty expensive. Just noticed that this book was reprinted last month and a paperback edition is now available for about £35 including postage. Andrew
-
Concrete building blocks are convenient for adding weight on top of a stack of timber. But you could use ratchet straps which would also hold it together and less likely to topple over if it is a tall narrow stack of planks. From the first post I wondered if the timber is still green in which case, you might find it dries quicker outside so that the air is constantly flowing through the stack when there is a breeze, rather than the still air in the workshop. Once it is air dried it could go in the workshop to reduce the moisture content further. Andrew
-
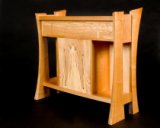
If you want to be certain that drying distortion/movement won't happen when you put a finished item into a heated home, you really need to check the moisture constant of the timber with a moisture meter. Air dried planks will usually dry down to aout 16% moisture content outside, but 8 to 10% is needed for indoor furniture, even down as far as 6% if the central heating is on a lot. Even if timber is left outside drying for decades, it will still shrink if taken into a heated home. One problem with using a meter is that it measures the moisture content at the surface. Ideally you need to cut off a few inches from the end of a plank to check the 'inside'. But if you do this a few times the plank quickly gets shorter! I usually just err on the safe side and keep planks in the house or workshop where there is a dehumidifier for 6 to 12 months. My Avatar is a hall table made from cherry from a tree that I cut down in a garden in return for the butt (I do this as a hobby by the way!). It also incorporates, lime from a garden of one of my work colleagues, spalted beech from a butt bought from a firewood merchant and cedar of Lebanon sawn off the end of a tree at a country estate which had blown down in a storm. All of which were free hand chainsawn into sections which could be manhandled into the back of an estate car, taken to a woodmiser for milling, followed by air drying outside and 'conditioning' in my workshop for a year or so. The finished hall table has been in our (well) heated house for several years and shows no sign of movement. This is just one of various things made over the years using timber seasoned in this way, so I am a real advocate of air drying outside and conditioning inside. But it does require patience in my experience. Andrew
-
I have a mini mill but have only used it after first cutting a slab off the top of a log to create a flat face onto which I fix a plank with the the guide rail. I'm not sure how easy it would be to use the mini mill to cut boards from a round log? Another issue is that the depth of cut will be several inches shorter than the bar. From memory, probably 6 to 8 inches shorter. With the small log mill you would only lose about 2 inches, but the recommended max bar length is 20 inches to give an 18 inch width of cut, which coincidently is about the same as the mini mill with a 25 inch bar. I used a small log mill for a couple of years before buying extra pieces to convert it to a 24 inch mill which I use on a 25 inch bar which gives about 19 inches width of cut. I found the small log mill great to use at first on a small chainsaw (14 inch bar!) and later on a larger saw with a 20 inch bar. But I find the 24 inch mill easier to handle and more accurate. From my experience over a few years using a mini mill, a small log mill and a 24 inch mill, I feel the 24 inch mill would be the most useful for the size of saw you already have. Logs which are larger than about 20 inches diameter could be halved by freehand cutting along the length so that the mill could then be used to cut planks from each half. Andrew


