

agg221
-
Posts
3,962 -
Joined
-
Last visited
-
Days Won
4
Content Type
Profiles
Forums
Classifieds
Tip Site Directory
Blogs
Articles
News
Arborist Reviews
Arbtalk Knot Guide
Gallery
Store
Freelancers directory
Everything posted by agg221
-
No difference - Oregon changed their coding system at some point. I have various old bars of dubious vintage which don't cross-reference; all that matters if you are buying a new bar branded as Oregon is that you know the correct current reference number. If you buy what is effectively an OEM part as referenced by adw then it will have the McCulloch part number as listed, but it is effectively the same part made by the same company, just down a different supply chain. You may find it easier to get a wider choice of bar length if you go down the Oregon route as it is easier to cross reference what will fit, rather than what was original equipment. Alec
-
Firstly, you can't use ANY standard bar of your specified pitch/gauge. You can however use any length of bar, although there will be maximum and minimum limits which are sensible. The thing which determines what will fit is the bar mount. This is the combination of location and size of the holes and slots which hold it to the saw and allow the tensioner to function, together with the location of the oil ways to make sure oil transfers at the correct point from the saw to the bar groove. Some bars can be modified, such as by increasing hole size and filing extra oil ways, but this is not an ideal place to start. On Oregon bars, the last four digits of the bar model number specify the bar mount, which in your case appears to be a T318. The ones I can easily find are on the Clark Forest site (Rob D's site is chainsawbars and I do his tech support - we don't list bars of this mount). This is the 18" one: Oregon 18 Inch Double Guard Chainsaw Bars | Clark Forest Alec
-
To be honest, I think you were doomed on that one. Looking at the last picture, it appears that there was a dip at the end another near the apex of the bend. Any line you took through it was going to leave it thin at one of those two points, so if you had gone closer to the centre on the thick end you would have gone very thin at the dip on the bend. The only option would have been to see if by rolling it so that the ends came up slightly you could get a slightly better shape, but it always a compromise when there is a curve in more than one plane. Alec
-
Fair enough - I would have thought you just list it 'spares or repair' and sell it for twice what a new one would cost Alec
-
Worth my time to extract alder
agg221 replied to Marsh Monkey's topic in Forestry and Woodland management
Sounds like I should be taking it up then. Alec -
Sorry, not with you? Alec
-
I have shown the pictures to one of our fatigue experts. Obviously we can't be definitive from the photographs, but we did make the following observations: The cracks are initiating at the edge of the bar. There are various initiators here - such as the sharp change in section at the edge of the rails and the profile at the bottom of the groove. The point of clamping provides a change in section, effectively creating a tight bending radius between the clamp and the bar, as the saw vibrates, creating a fatigue situation. Notably, failure is not at the outer edge of the clamp, but within the clamped region, effectively at the apex of the bend on the bar rails if the mill was held in operational position with the powerhead hanging under its own weight. This may indicate that the chain action is a factor (effectively another cyclic loading), rather than purely vibration from the powerhead. On right hand rail it appears that the surface is no longer flat, but rather is worn down in the region of the crack. Do you regularly flip the bar, or would you happen to know if this has been predominantly the upper side when milling? One possible scenario drawn from the above is that, when milling, the powerhead is hanging mostly free under its own weight, or is being habitually pushed slightly downwards. This is putting a bend on the bar, which ends where the clamps are so there is a slight change in chain direction and a point of peak stress which coincide. Over time, the chain running round this radius causes fretting, which initiates a notch at an already sharp change in section on the rail edge. Failure then occurs from the notch due to the stress cycle of constant load from the powerhead weight + cyclic load from the vibration of the engine. If the above scenario is correct, some factors which will have a bearing are: Sugihara bars are more likely to suffer from it because they don't wear so fast. If the rail wears faster than the notch propagates the problem doesn't arise - notably this is the same issue as caused the failure in rail track at Hatfield, where lighter trains didn't wear out the rail fast enough to stop the cracks propagating. Failure is more likely if you don't flip the bar regularly - it will effectively halve the life. Failure is more likely if you use a winch than if you push carefully from the powerhead, as the downward force will be greater and vibration will be less damped (by your arm!) It may be advisable to keep an eye on the bar at this particular point, for signs of wear, and dress back the rails if wear is observed. Hope this helps. Alec
-
Only thing I would suggest is to make sure you are using a semi-chisel rather than full chisel chain. Alec
-
Thank you for the positive comments The fact that I have been able to lie in bed looking at this for the past couple of months has given me plenty of opportunity to figure out what to do with it. Still very satisfying that it worked out though. Alec
-
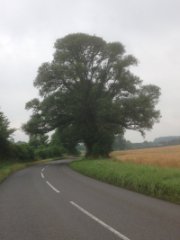
What would help is an overview shot of the whole tree. It looks from the little you can see as though there are some substantial branches on the fence side - if there are none facing the other way then it would probably go where the weight is. If you need to reduce it, bear in mind that cherries don't like being pruned while not in leaf as they have a tendency to contract silverleaf. April to August is a good bet. I have seen orchard trees with worse damage than this standing indefinitely, but they are pretty much monoliths with some small branches only. Alec
-
Just to be aware, it may well be an 070. Alec
-
Not pretty but structural. This weekend has seen completion of the structural timber of the extension. The last bit was the most fiendishly complex of the lot, connecting the end of the ridge beam in the extension to the middle of the beam spanning the first floor opening. What made it particularly difficult is that you can't lift the ridge beam up to use a conventional mortice and tenon joint, so a sliding tenon was needed. The space is only 16" high and has joists and the water tanks right behind it so access is terrible, with the mains water supply running right past it and there is no way to turn this off. Procedure was make all the bits, slide it into place from behind, line up the sliding tenon and push it down using wedges in the side holes (adding the short upper block when halfway home) and then finally peg in place. Turned out OK I think, with a certain sense of relief... Alec


-
Afraid I have no specific leads to find one of these - I buy the odd thing from ebay.com in the US which is where I would go looking. Alec
-
There is a trade-off with Sugihara bars in particular. They are much harder than anything else, which is why the wear so well. However this comes at the price of reduced toughness. It would be interesting to see some close-up photos of the cracks but, without having seen them, my guess is that you will be able to see cracks starting from the edges of the rails and it would be possible to work out which side went first. I am anticipating seeing fatigue crack features and would be looking for the combination of notch initiation and stress raisers. One thing that would be very useful in root cause analysis would be to know where exactly the crack is - powerhead end or nose end, and between the clamps or outside the clamps. My (educated) guess is that it will not be outside the clamp at the nose end. If I had to hazard a guess at location I would be going for outside the clamps at the powerhead end, with initiation on the upper face of the bar as it was fitted in the mill, but I would be interested to know if I'm right. Alec p.s. if you email tech@chainsawbars you get me anyway
-
Hi Kenty, glad to help. I thought this might be a useful case study on originality (note, this is not a criticism of the saw or the seller - this is a vintage workhorse and the odds of bits being changed is very high): STIHL 090 137 CC CHAIN SAW GOOD WORKING ORDER | eBay The first thing that stands out is that the saw is described as an 090, has the correct shape recoil cover and a 6-shoe clutch is mentioned. It is therefore almost certainly going to be one. The date is quoted as 1973-76. It could be, however the recoil cover and top cover definitely aren't. The recoil cover has a rivetted on Stihl badge, rather than a cast in old style Stihl logo. It also doesn't say 'Made in West Germany' so this is the very late model recoil cover, which is actually still available directly from Stihl. The top cover is interesting. It is the wrong shade of orange for the stated date - should be red (but it does say there has been some repainting). However, for this date the main cover with the Stihl badge in it should have raised cast letters which were originally painted white. The one currently on there has the Stihl badge coming right to the edge, so it is designed to be a two-part badge. Note it is rivetted on. This is the 1980s pattern. The air filter cover however doesn't go with this top cover. There is a lip at the edge of the casting so the badges are not lining up. This is the case with both the earlier type, where the model number was printed on the reverse side of a piece of clear tape and stuck in, and the later type where a one piece badge was stuck on. However, the later type had a smaller rebated window with rounded corners, so this is the early type - it would actually be compatible with the 1973-76 date. The 090 badge however is a modern copy, probably bought from Ebay in the US. In theory it goes with the top Stihl badge - it is aluminium and has the cutout to fit around the spark plug lead, as it would if the air filter cover which matched the top cover was fitted. However, the font is wrong, and it does not have rivet holes so does not go with the Stihl half of the badge. The clutch cover is, I believe, the slightly later. The earlier ones didn't have Stihl cast in, and in fact looked very like the Chinese copies. The remains of the paintwork on the wrap handle are black, which is correct from about 1970 onwards. Not a criticism of it in any way - if you were buying it to work none of this would matter and a collector would know anyway. I just find it interesting how much you can learn from a few photos and it may help someone trying to assess what they are looking at. Alec
-
It's interesting that they have decided to keep supplying the MS720 but not the 090, and not the AV model. AV was available right from the beginning to the end of the production run for the 090 and 070 in most countries - it was even redeveloped for the later saws. They share so many parts in common that I would be surprised if you couldn't convert an MS720 to an 090. Given its enduring popularity and the advantages of AV I would have thought the 090AV would have been an obvious saw to keep making, in parallel with an MS720AV, but clearly not. Alec
-
To explain why, and what to look for. The 090 and the 070 share almost all components, to the point where you can quite reasonably turn one into the other and it is not 'fake'. The parts which are different are: The recoil starter. The one on the 090 is bigger so the housing fins are straight. The 070 has a concave starter housing. The clutch. The 090 has a larger 6-shoe clutch whereas the 070 has a smaller 3-shoe clutch. The barrel and piston. The 090 has a 66mm bore whereas the 070 has a 58mm bore. There is also an externally visible witness in that, although the decompression button is in the same side on both due to the shared top cover, the decompression lever runs front to back on the 090, parallel with the carb/exhaust and across the casting marks on the top. On the 070 it runs side to side, perpendicular to the ports and parallel to the casting marks. This also seems to hold true of all the aftermarket ones. You have to take the top cover off to see it, but this only held on with three screws - the two visible ones at the front and the one under the air filter cover. Alec
-
Yes - except that that one may well be an 070.... If you are offered an 090 and confirm that this is definitely what it is, in full working order, freshly serviced, I would say anything under £450 is a very good price. The AV model would be more and if it has a sprocket or roller nose bar in decent condition that will also add a bit. Worth noting, you can't tell age from lack of chainbrake (they never had them) or AV/non-AV as these options were run in parallel. There are some features which allow you to get a rough age, such as the colour/style of the top, type of badge on the starter cover and the arrangement of the badges on the top cover but these parts are also easily interchangeable. Alec
-
If you can, it's better to put the stake in first. It's slower to line the tree up to the stake properly, but it means you don't cause root damage hammering it in. Alec
-
Hi James, it will take all ferrous staining off a surface, but it doesn't penetrate very easily, so unfortunately it won't take it right out through a nail stain. I've never tried it to see what the surface looks like if you treat this type of stain though so it might be worth trying. For what it's worth, if you don't want to buy oxalic acid, boiling up some rhubarb leaves is a good source. Alec
-
The staining will be a reaction between the iron in the band and tannin in the wood - classic purple/blue staining. This indicates that the band is rubbing. It may be that the band is running not quite in line with the cut, ie slightly twisted. Is it all along the cut or does it start part way down? If it's all along the cut it is more likely to be in the mill set-up, if part way down it may be the wood moving around due to release of stresses as the board comes off. If it's the wood moving, it may be worth taking the first cut up the middle of the log - this will take most of the stress out and minimise further movement. The stain doesn't go deep as there is no iron present on the board surface to carry it deeper. You can either ignore it as it will sand/plane out when the boards are finished, or if you need it gone then oxalic acid solution will take it off. Be careful handling this as it is a poison. Alec
-
Hardwood or softwood? Hardwood grading is visual, softwood is mechanical testing. TRADA offer visual grading training - Training courses | Exova BM TRADA but it's worth noting that, so far as I am aware, grading is to a standard rather than to a qualification, ie anyone can grade so long as they are prepared to put their name to it. This may not help much, but it's worth noting that there is technically no grading standard that applies to green hardwood. You can use the same criteria of course, but it is technically not to the relevant British Standard as this is only defined for seasoned timber. Alec
-
A tactic for getting meetings which works for me. Ring from a number they won't know and ask to speak to the relevant person. When you get put through, rather than asking 'can I come and see you tomorrow?' ask 'I need to come and discuss this with you, when is convenient for you?' If you get comment about 'I'll get back to you' then politely state that 'since you're at your desk' (you know this because you got put through to them) 'and I have my diary, lets set a date and time now while it's in both our minds, as otherwise it might get overlooked'. I find the above to have a very high success rate. Alec
-
Some general thoughts from a non-arb business. To succeed, in steady-state you need to maintain a balanced flow through a sales pipeline to delivery (and payment!). If you are growing, you need to increase capacity at whichever step(s) present the barrier. At the beginning of the pipeline, you have awareness (advertising in one form or another) which creates opportunities. You then have enquiry handling and conversion, finally delivery. If you break it down like this, can you identify where the bottlenecks are, and where you are over-capacity? If you don't have enough enquiries to allow you to feel comfortable, ie you need to convert too high a percentage, then you are better off investing in advertising. If you already have more enquiries than you can reasonably convert and are failing to even consider them properly, you can scale back on advertising. The same principle applies along the chain. Once you know where the bottlenecks are, you can consider what is the most cost-effective way to relieve them. The same applies to areas of excess capability - just because something breaks or wears out you don't need to replace it automatically. Consider whether the business is changing direction first. There is also a time factor here - if you need a quick boost on orders then a lot of flyers/phone calls may help but if you are OK for the moment then you can cut costs in the longer term by building up a reputation and relying on word of mouth and repeat customers. It's worth bearing in mind that quality as well as cost will ultimately make or break you. You can't compete with two men in a white transit with some blue polyprop rope, so you need the right balance of quality and price-point. Lower price-point will probably secure more volume, but on a lower margin. If you need to keep a larger team busy then this is probably more appropriate (it seems like you are already in that bracket if you are doing a lot of back-garden work with poor access). This isn't of itself a bad thing - you just need the right kit for the market you are addressing so if you haven't considered this you may already have some surplus items (sell off on Arbtrader?). However, get any of the steps out of sync and you can damage your reputation very quickly - people get annoyed if you say you will turn up and you don't - that may be that you don't turn up to quote because you have too many jobs to quote for, or you don't do the job when promised due to equipment failure. Your fault or not - the customer is always right, certainly when they are telling their friends about you. Alec
-
Single or three phase currently? Alec


